Mac desktop repair
How to Fix System Preferences on Mac OS X | The Easy Way
Deleting preference files (well, refreshing them) on your Mac is incredibly easy with a Mac utility like CleanMyMac X. It scans your Mac for preference files that are broken and removes them with just a click of a button. CleanMyMac X contains a few cleaning modules responsible for cleaning your Mac in the most efficient manner. The System Junk module looks through your system and application folders to find different kinds of unneeded files, including broken application and system preferences.
To fix preference files on your Mac with CleanMyMac X, just:
- Download CleanMyMac X (click here to download it).
- Launch CleanMyMac X and select System Junk on the left.
- Click Scan.
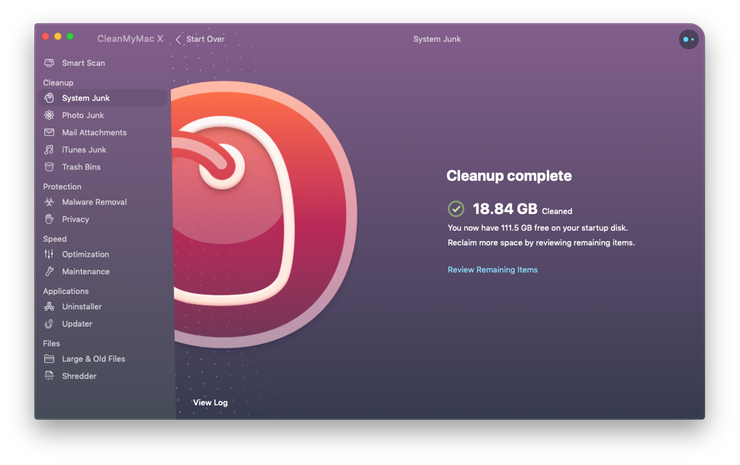
- And then click Clean.
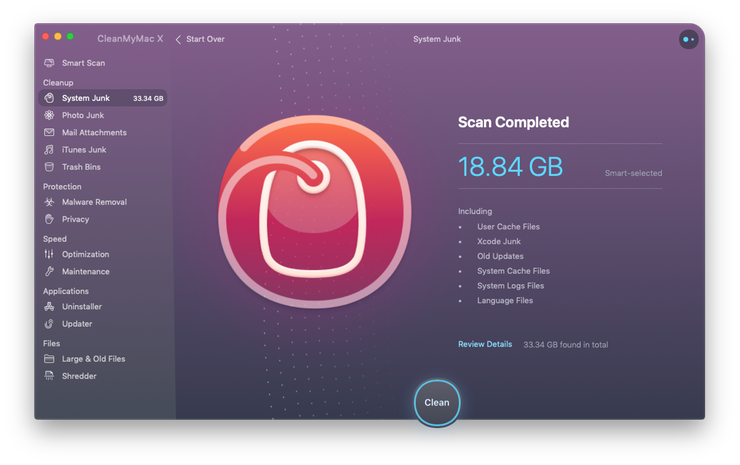
In a few seconds, your Mac will be cleaned of unneeded system data, including broken preference files. If you’d only like to remove the broken preferences, before you click Clean, select “Review Details,” only checkmark the box that says “Broken Preferences,” and then click Clean. CleanMyMac X makes reseting system preference files on Mac incredibly simple. And it does a ton more, too. You can read more about it here.
However, if you’d prefer to remove Mac system preference files yourself, check out the section below.
How to Delete System Preference Files on Mac OS X | The Hard Way
How to find system preferences on a Mac? All preference files are stored in /Library/Preferences. Usually they named in this manner:com…plist

Now, if you have an application that works incorrectly, you can find the corresponding preference file in the above-mentioned folder and remove it from there. On the next launch of the application, it will recreate a default version of that file and then begin working properly. However, if this doesn’t happen, that it may be a good decision to put the broken preference file back — They can be a bit temperamental. It’s highly advised that you make a copy of the preference file before you delete it, just in case something goes wrong.
So, to remove unnecessary system preferences (or preference files that are bugging your your application), check the:/Library/Preferences
…system folder. To do this, open a Finder window, press Cmd+Shift+G and type the above in. However, be aware that items stored in that location could be incredibly important to your system and how it functions, so you should be 100% sure about the files you’re going to delete.
But again, we’d recommend looking into CleanMyMac X — it makes fixing and removing broken preference files on your Mac easy as can be.
We hope this article has helped you understand what Mac system preferences are, and how to delete system preference files on Mac.
Vorgehensweise für das Löschen einer Festplatte
Befolge je nach Bedarf die Anweisungen zum Löschen eines oder eines . Das Startvolume ist das Laufwerk bzw. das Volume, von dem der Mac gestartet wird. Standardmäßig handelt es sich dabei um das Laufwerk, das in den Mac eingebaut ist. Es trägt die Bezeichnung “Macintosh HD”. Falls du deinen Mac verkaufst, weitergibst oder in Zahlung gibst, solltest du dein Startvolume löschen.
Startvolume löschen
- Starte den Computer aus der macOS-Wiederherstellung.
- Wähle in der macOS-Wiederherstellung im Fenster “Dienstprogramme” das Festplattendienstprogramm aus. Klicke anschließend auf “Fortfahren”.
- Vergewissere dich, dass im Festplattendienstprogramm in der Seitenleiste der Name des Startvolumes angezeigt wird. Das Startvolume heißt “Macintosh HD”, sofern du es nicht umbenannt hast.
- Suche nach einem “Data”-Volume mit demselben Namen, z. B. “Macintosh HD – Data”. Falls ein solches Volume vorhanden ist, wähle es aus. Wähle dann in der Menüleiste “Bearbeiten” > “APFS-Volume löschen” aus, oder klicke auf die Taste “Volume löschen” (–) in der Symbolleiste des Festplattendienstprogramms.
Wenn du aufgefordert wirst zu bestätigen, klicke auf die Taste “Löschen”. Klicke nicht auf “Volume-Gruppe löschen”. Führe diesen Schritt auch für andere Volumes aus, die sich unter Umständen auf deinem Startvolume befinden, außer für das Volume “Macintosh HD”. - Nachdem du alle Datenvolumes gelöscht hast, wähle in der Seitenleiste “Macintosh HD” aus.
- Klicke auf die Taste bzw. den Tab “Löschen”, und fülle folgende Felder aus:
- Name: Gib den Namen ein, der das Volume bezeichnen soll, nachdem du es gelöscht hast, z. B. “Macintosh HD”.
- Format: Wähle entweder , damit die Formatierung als Mac-Volume durchgeführt wird. Das Festplattendienstprogramm zeigt standardmäßig das empfohlene Mac-Format an.
- Klicke auf “Löschen”, um den Löschvorgang zu beginnen. Du wirst unter Umständen aufgefordert, deine Apple-ID einzugeben.
- Schließe das Festplattendienstprogramm, wenn der Vorgang beendet ist, um zum Fenster “Dienstprogramme” zurückzukehren.
- Wenn du möchtest, dass dein Mac wieder von diesem Volume starten kann, wähle macOS erneut installieren im Fenster “Dienstprogramme”, und folge dann den Anweisungen auf dem Bildschirm, um macOS auf dem Volume erneut zu installieren. Wenn du macOS nicht erneut installierst, wird beim Starten deines Mac möglicherweise ein blinkendes Fragezeichen (?) angezeigt.
Informationen zu APFS und Mac OS Extended
Das Festplattendienstprogramm in macOS High Sierra oder neuer kann die meisten Festplatten und Volumes für den Mac entweder mithilfe des neueren APFS-Formats (Apple File System) oder des älteren Mac OS Extended-Formats löschen. Dabei wird automatisch ein kompatibles Format für dich ausgewählt.
Das aktuelle Format bestimmen
Wenn du wissen möchten, welches Format derzeit verwendet wird, nutze dazu eine der folgenden Methoden:
- Wähle das Volume in der Seitenleiste des Festplattendienstprogramms aus, und überprüfe die Informationen auf der rechten Seite. Wähle für weitere Details in der Menüleiste des Festplattendienstprogramms “Ablage” > “Informationen”.
- Öffne Systeminformationen, und wähle in der Seitenleiste “Speicher”. Die Spalte “Dateisystem” auf der rechten Seite zeigt das Format jedes Volumes an.
- Wähle das Volume im Finder und anschließend in der Menüleiste “Ablage” > “Informationen”. Das Fenster “Informationen” zeigt das Format des Volumes an.
Can’t Empty Trash on Mac
Check if the file is in use by any app
If you get an error about “File in Use”, then try closing the app that is using the file (in case you know the app). Alternatively, you can also close all the running apps to make sure that the file is no more being used by any of the apps. Now try to empty trash, if it still doesn’t clear the dump, keep reading.
Force Empty Trash in Mac OS X When File is Locked or in Use
In case you are getting a Locked file error, then press and hold the Option key, go to Finder → Empty Trash. This should have surely helped you in clearing Trash. The Option key signals macOS to bypass the locked files. Anyways, even if this didn’t work out for you, keep reading for more fixes.
Use third-party utilities
There are many third-party utility apps to forcibly empty the Trash folder. If you have them installed, give it a try. I would personally not recommend downloading and using them. That’s because they ultimately flash Terminal commands to delete Trash files, which we have given below, so have a look.
Empty Trash on Mac Using Terminal
This is the ultimate step you should take, only if all of the above have failed. As these commands will delete locked files without alerting you anything. Make sure you do exactly as it is written below.
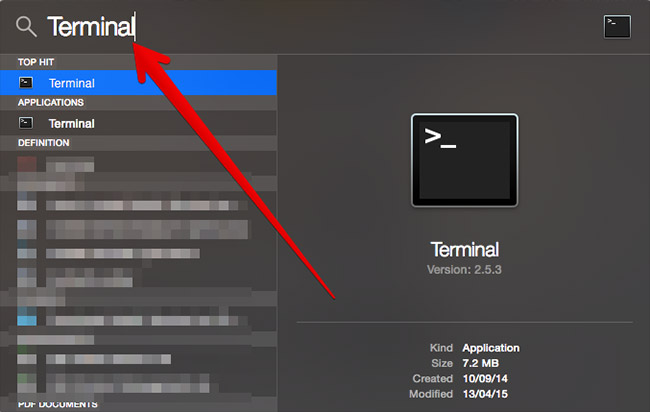
Step #1. Open Terminal on your Mac.
Step #2. Now type, followed by space. Leaving a space is mandatory, so do not miss that step. And yes, DO NOT HIT RETURN AFTER YOU ENTER THE COMMAND.

Step #4. It’s now time to open the Trash folder from the Dock.
Step #5. Select all the files and folders from the Trash folder, drag and drop them into Terminal window. Doing this will add the path of each file and folder to the “Remove” command we entered at Step #3.
Step #6. Now you can hit Return and then enter your administrator password to continue the operation.
The deleting process will begin and might take a couple of minutes, depending on the size of files and folders you are deleting.
Try out this trick as well, if nothing seems to be working for you.
Step #1. First off, turn off your Mac. Then, you need to hold down command+R when starting your computer. Keep holding the keys until Apple logo appears on the screen.
Your Mac will enter into recovery mode.
Step #2. In the top menu bar, you have to click on utilities. In the drop down, you need to click on terminal. Next, it will open up a terminal in order to run a command.
Step #3. Next, you will have to type in the command cs0util disable and press return.
Then after, you have to click on the Apple on the top left and click restart.
Step #4. Next up, empty your trash as usual.
Wrap up
Assuming you have been able to empty the trash on your Mac. As these solutions have worked for many users, I’m expecting they have clicked for you as well. It would be really nice if you share your feedback and let us know whether you have found success using these fixes.
You might want to catch up with these troubleshooting guides as well:
- How to speed up macOS Sierra
- Wi-Fi not working in macOS Sierra
- Apps Missing from Launchpad in macOS Sierra
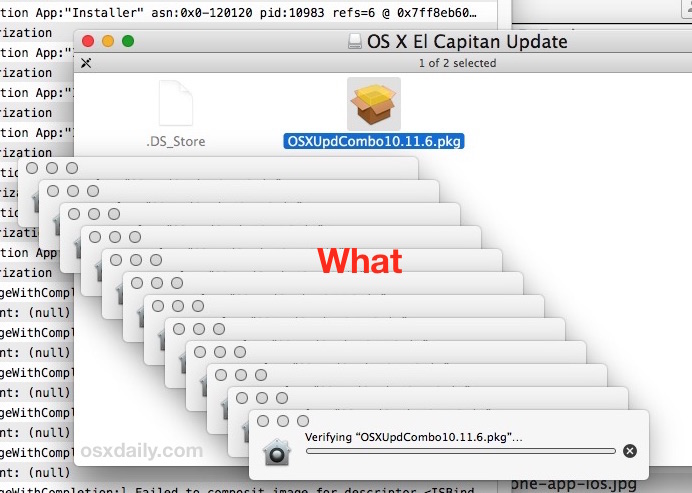
Forcing a Stuck Verifying .pkg Installer to Run in Mac OS X
Re-download the installer: Before anything else, you should consider that the downloaded .pkg installer, dmg, or updater may have been corrupted or perhaps is incomplete. The very first step should be to re-download the pkg or dmg in question, and always get it from a trusted source (for example, get the installer or update directly from the developer and never from a third party downloads site). If you know the installer package is legitimate, completely downloaded, and not corrupt through hash verification or otherwise, proceed as usual.
Assuming the .pkg, .dmg, or installer app is legitimate and still stuck on “verifying” then here is what you can do to force it to run:
- From the Finder in Mac OS X, hit Command + Shift + G and enter the following path:
Locate the app named “Installer.app” from this directory and launch it directly

Navigate to the .pkg file that is stuck on verifying and select to open it

Success! Run through the package installer or update as usual
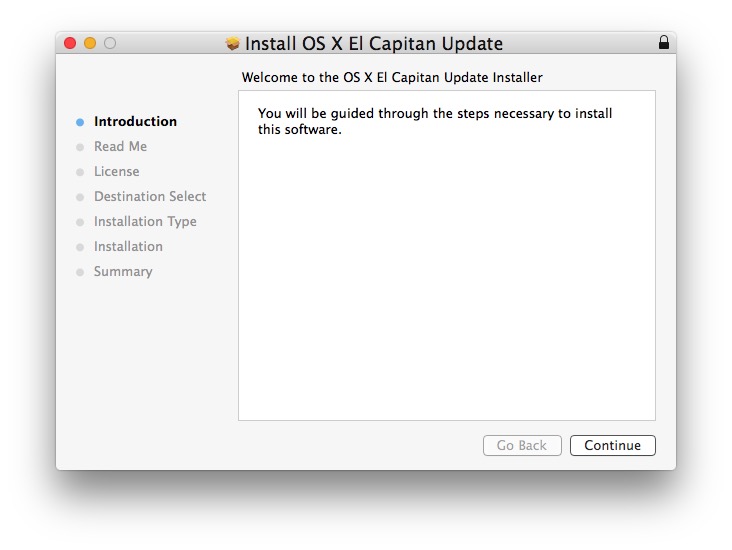
The package installer should now work just fine, whether it’s a software update for Mac OS, a third party app, or whatever else was stuck in the verifying stage. This seems to happen most often with installers that are run from a mounted disk image, but it can occur with downloaded .pkg updates as well.
Another possible option would be to disable Gatekeeper to prevent the verification process from unidentified and identified developers from running in the first place, but that is really not a good idea as it could open the Mac up to broader vulnerabilities or other issues.
For those who like to dig a little deeper to see what’s going on behind the scenes with the failed verifying attempts, you can open the Console app (/Applications/Utilities/) and you’ll typically find messages from launchservicesd and CoreServicesUIAgent with ‘Error -60006 creating authorization’.

I ran into this exact issue recently when using a Combo Update for Mac OS X on a particular machine getting it up to date with OS X 10.11.6. Strangely, the verifying process failed and multiplied itself nearly a dozen times, which unsurprisingly didn’t work at all. Nonetheless, running the .pkg file through the Installer app allowed the system update to install without a hitch. This is a fairly rare hiccup to occur with installations and updates, but I’ve seen it happen with Microsoft Office, VirtualBox, Mac OS X, and other downloaded updates as well.
Did this work for you? Do you know of another solution to this type of issue? Let us know in the comments.
tags
3sensu
автобронзат
аксессуары
гаджеты
здоровое питание
Имею спросить
масло-сыворотка для волос
мероприятие
очищение волос
очищение лица
очищение тела
уход за волосами
уход за губами
уход за лицом
уход за ногами
уход за ногтями
уход за полостью рта
уход за руками
уход за телом
фиксатор макияжа
academie
Affect
Algotherm
Alpha-H
Ambi Pur
American Apparel
Anastasia Beverly Hills
Aravia professional
Ardell lashes
Art-Visage
Artdeco
Attirance
Aussie
avene
avon
Axioma
Babor
BareMinerals
Bath&Body Works
Batiste
BDB
beauty blogger awards
Beautyblender
beautybox
beautydrugs
Becca
BelorDesign
Benefit
BH cosmetics
Bioderma
Biore
Biosilk
Biotherm
Bite Beauty
Blend-a-med
blush
bobbi brown
Bohemia
bonacure
Bourjois
Braun
Bronx colors
bronzer
brows
Burberry
Bvlgary
By Terry
candle
Caolin
Capri Blue
Cargo cosmetics
Catrice
caudalie
Cettua
Chanel
Charlotte Tilbury
China Glaze
clarins
Cle de pea
clinique
Co Lab
Cocobody
Collistar
ColourPop
corrector&concealer
Coulers by Qnet
Covergirl
Curaprox
dance legend
daniel jouvance
Darphin
Deborah
Deborah Lippmann
Dermablend
Desert Essence
dior
Divage
Dolce&Gabbana
Dose of colors
Dove
dr. pierre ricaud
ducray
E.L.F.
Edgardio Chilini
el corazon
empties&shopping
erborian
Essence
Essie
Estee Lauder
Estel
Estrade
Etude House
Eva Garden
Eva mosaic
eveline
Evgeni
eyeliner
eyeshadow
Faberlic
Face Fine
fall2015
false lashes
fashion show
favorites
Featured
Filorga
Flormar
foundation
fresh line
Frey Wille
garnier
Gerard Cosmetics
Gillette
Giorgio Armani
giveaway
givenchy
glambox
Glamglow
GOLDEN ROSE
Gosh
Graftobian
Guerlain
Guinot
H&M cosmetics
hairstyling
Hakuhodo
handmade
HD Brows
head&shoulders
Helvance
Herbalife
Heya
hightlighter
home fragance
home spa
Hourglass
hugo boss
IconFace
Infinum
Inglot
Irushka
Is Clinical
it cosmetics
it’s skin
Japonica
Jo Malone
John Frieda
Just makeup
Kanebo
Karin Herzog
Karma
Kat Von D
kensuko
kenzoki
Kerastase
Kevyn Aucoin
Kiehl’s
Kiko
Kilian
Kiss NY Professional
Klorane
L’Affair
l’etoile
L’occitane
La Prairie
la roche-posay
LAgirl
Lancome
Laneige
Lime Сrime
limited edition
Limoni
lipbalm
lipgloss
lipliner
lipstiсk
Lorac
Loreal
Lumene
Lush
LV
Mac
Maison Francis Kurkdjian
Make up Atelier
make up for ever
make up palette
makeup base
makeup brushes
Makeup Geek
Makeup Revolution
Makeup Secret
Manly Pro
Marc Jacobs
Marc Jacobs beauty
Marvis
Mary Kay
mascara
MaxFactor
May Coop
Maybelline
Melvita
Michael Kors
Milani
Missha
Mizon
Montale
Morphe
mother’s choice
MUD
NailLook
nailpolish
NARS
Natura Siberica
Neutrogina
Nivea
noemie rocher
Nuxe
NYX
Ofra
online shopping
OPI
organic shop
Oriflame
Origins
Orly
Orofluido
Paese
parfume
payot
Pearl Drops
Philips
Pierre d’Alun
pigmet
planeta organica
Pleyana
Poetea
powder
Premier
Premium
PresiDent
primer
Promakeuplab
Pudra
Purity Herbs
R.O.C.K.
Real Techniques
Redken
Relouis
Revlon
Rimmel
Rituals
Romanovamakeup
Rosendahl
Rouge Bunny Rouge
sally hansen
schwarzkopf
Sculpting powder
Sensai
Senteurs d’Angkor
Sephora
Shik
Shiseido
shopping
Skindinavia
Skinlite
Sleek MakeUp
Source Naturals
St. Moriz
St.Ropez
Stellary
Stenders
Sue Devitt
Swarowski
Syoss
Talika
Tammy Tanuka
Tangle Teezer
Tarte
Tata Harper
The Balm
the body shop
The first aid
Tom Ford
Toni Moly
Toni&Guy Hair Meet Wardrobe
Tony Moly
Too Faced
travel cosmetics
Trind
Urban Decay
VG Professional
vichy
Victoria Soap
Viktor & Rolf
Vivienne Sabo
Voluspa
weleda
wellness
Wetnwild
Whiteninglightning
Yllozure
yves rocher
Yves Saint Laurent
Zoeva
Fix 9: Reinstall or Clean install macOS
Are you tired none of the solutions not working! we highly recommend testing FaceTime after reinstall macOS. The process is very easy for Reinstall Mac and Clean install. Reinstall OS install a new copy of macOS without Delete user data and Clean install Erase All Data first and install a new copy of macOS.
Before the move to start the process, keep backup of your Mac data in an external drive or Time Machine backup.
-
- Restart your Mac.
- Press and hold Command + R Key from a keyboard after listening to Mac Startup sound.
- Lift Keyboard keys after you see the macOS Utility window on the screen.
- The second option is Reinstall macOS, Go with the option and Start installing new MacOS on Buggy Mac Drive.
-
- Restart your Mac.
- Press and hold Command + R Key from a keyboard after listening to Mac Startup sound.
- Lift Keyboard keys after you see the macOS Utility window on the screen.
- Last option is Disk utility, Click on it.
- From Disk Utility Windows Select the Primary Drive from the sidebar and click on the Erase option from the top.
- After Erase the Drive completely close Disk Utility window. and You are now on the macOS Utility window.
- The second option is to install macOS, Go with the option and Start installing a new copy of macOS on Buggy Mac Drive.
- That’s it
Fix 10: Check Date & Time on your Apple Mac Computer or Laptop
The messaging and video calling applications require an accurate date & time as per your time zone. If not, then definitely at the very first moment it will show an error. FaceTime comes under that category so go and check the date and time of your Mac.
- Step #1: Click on the “Apple” icon.
- Step #2: Open “System Preferences”.
- Step #3: Click on “Date & Time”.
- Step #4: Turn on “Set Automatically”.
- Step #5: Verify the time zone and city is correctly selected.
if you also facing issue to use FaceTime on iPhone – Get Fix FaceTime not working iPhone
Note: Certain features may not work in macOS Beta and Developer beta, in this case, you should submit a report to Apple via Feedback App. I hope it will resolve your FaceTime issue in the ext latest mac Mojave Update. Thanks for Reading.
Enjoy FaceTime on Mac and get Group video call chat experience like you never get before!
Premium Support is Free Now
We are happy to help you! Follow the next Step if Your Solution is not in this article, Submit this form without Sign Up, We will revert back to you via Personal Mail. In Form, Please Use the Description field to Mention our reference Webpage URL which you visited and Describe your problem in detail if possible. We covered your iPhone 11 Pro, iPhone 11 Pro Max, iPhone 11, iPhone 8(Plus), iPhone 7(Plus), iPhone 6S(Plus), iPhone 6(Plus), iPhone SE, iPhone 5S, iPhone 5, iPad All Generation, iPad Pro All Models, MacOS Catalina or Earlier MacOS for iMac, Mac Mini, MacBook Pro, WatchOS 6 & Earlier on Apple Watch 5/4/3/2/1, Apple TV. You can also mention iOS/iPadOS/MacOS.
To be Continued…
- Is this article useful?


